Developing the front squat is valuable not only for the exercise itself but also as a crucial component of other movements in our workouts, such as the clean and the thruster. The mechanics of the front squat greatly influence the loads we lift and our efficiency in conditioning workouts. The front squat places substantial demand on the lower body, particularly the quads, due to the load placement and the need for a more vertical torso. The trunk muscles, including the abdominals, obliques, and spinal erectors, play a crucial role in maintaining stability, which can make or break a lift.
Despite its simplicity, the front squat is often overshadowed by more complex movements. Success in this exercise requires solid air-squat mechanics, a proper rack position, and ensuring the barbell moves in a straight vertical path. Mastering this movement can be challenging for athletes, but it’s essential for overall performance.
Squat mechanics
At the Level 1 Certificate Course, we talk at length about the primary points of performance (POP) that build the foundation of squat mechanics. We strive for execution points that include:
- Maintaining a neutral spine
- Pushing the hips back AND down to initiate the descent of the movement
- Ensuring the knees track the toes
- Maintaining pressure in the feet that may be slightly biased toward heels
- Striving for a depth below parallel
Mature front squat
If any piece of this puzzle is missing, the coach will aim to refine it to ensure the best execution under load. The coach’s guidance is crucial in identifying and correcting any deviations from the ideal squat mechanics, so the athlete can perform the movement with maximum efficiency and safety.
Maintaining as much of a vertical torso as possible is a nuanced element vital to front-squat performance. A mature squatting position (vertical torso) will allow the bar path to travel in a straight line over the midfoot (frontal plane), giving you the most mechanical advantage possible for the lift. An athlete with an immature squat (excessive forward torso lean) will find it challenging to execute the movement, causing more stress on the wrists and back due to the bar path traveling forward.
Primary reasons for an immature squat include but are not limited to:
- General muscle weakness (particularly the core and posterior chain)
- Lack of motor control (improper mechanics)
- Inflexibility (ankles and hips)
As an athlete, it can be tempting to go for the quick wins and straight to corrective exercise gimmicks, but consistently practicing the movement at slow tempos and intentional pauses under the watchful eye of a coach is critical to building strength, motor control, and flexibility.
Here’s a great drill for helping your athletes improve their front squat.
In your warm-up, two to three times a week, add 2-3 sets of 5 quality reps of:
- A 3-second eccentric phase
- A 3-second pause in the bottom
- A 3-second lifting phase
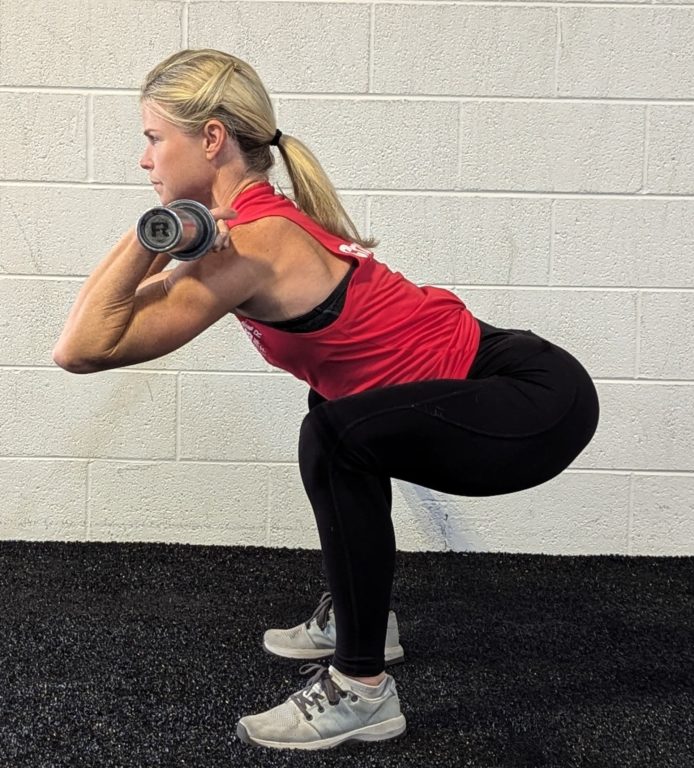
Immature front squat
Performing the movement with quality and control is the No. 1 drill for improvement.
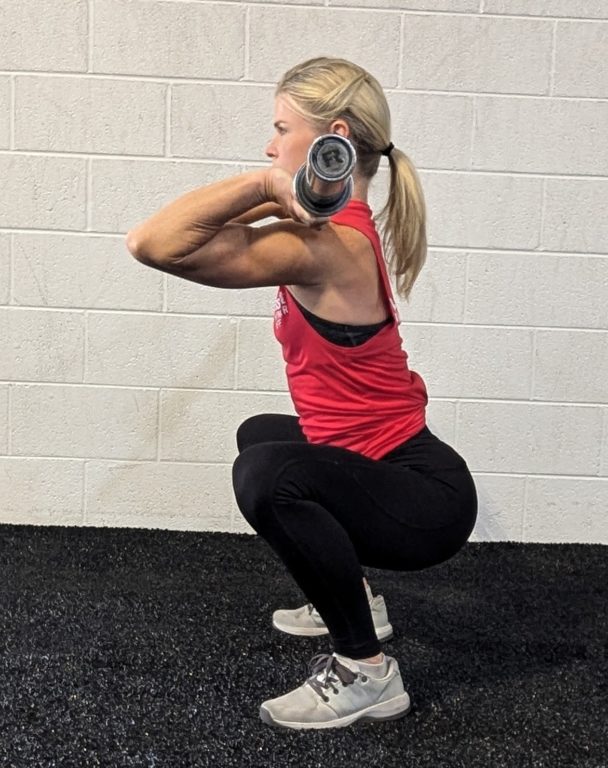
You can also offer cues and coaching drills to refine the immature squat. One cue that is very helpful but often missed is this: At the initiation of the movement, move the hips and knees simultaneously so the hips move back and down, NOT back then down.
You can also cue the athlete to squeeze their glutes toward their ankles when they’re in the bottom position. To decrease the difficulty of this practice, you can have athletes hold onto a pole or support beam.
Another drill to help athletes engage their trunk and posterior chain more effectively could be to have them squat with a counterbalance.
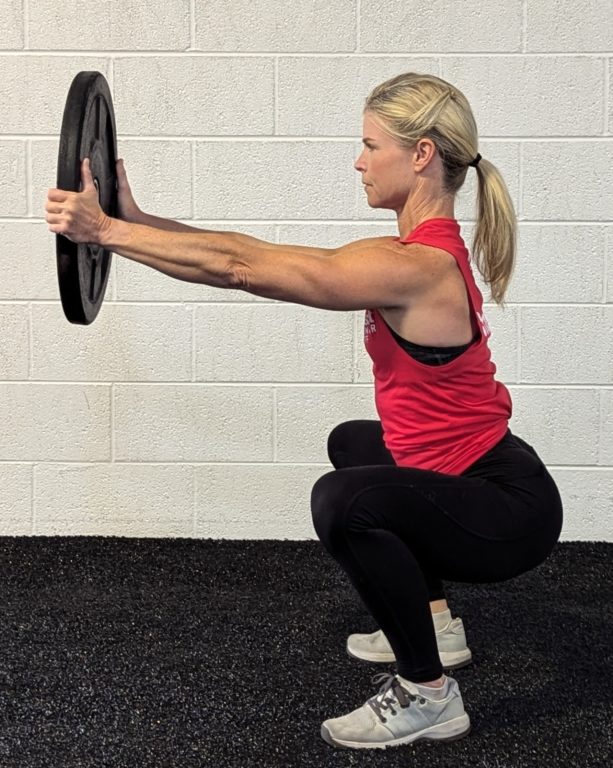
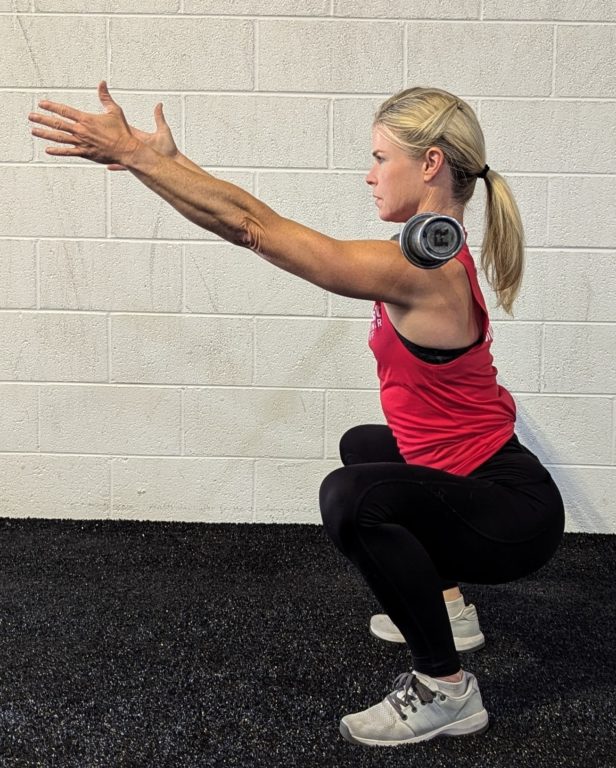
Front squat counterbalance drill
In this drill, the athlete holds a 5- to 10-lb plate, extends their arms away from their body, and performs a controlled squat. The weight of the plate acts as a counterbalance, encouraging the athlete to engage their trunk and posterior chain to maintain stability. Instruct them to pause at the bottom under tension to feel the position. Then, have them recreate that position without the counterbalance. You can also take the plate away from them while they’re holding the bottom position and ask them not to move. Be aware, they might lose their balance on the initial attempt. If you don’t think the athlete will be stable enough not to fall over when you take the plate away, skip this option.
As mentioned, flexibility is best developed by performing the full movement at a controlled tempo while working toward the best positions possible. However, if you notice the athlete has difficulty pushing their knees forward while keeping the heels in contact with the floor, or they squat dramatically better when their heels are elevated, they are likely tight in the ankle/lower leg area. There are various ways to work around this, such as adjusting their stance, but you could also have them do an ankle stretch during the warm-up for short-term release.
the rack position
Loose grip
The next critical element for successfully executing the front squat is establishing and maintaining the proper rack position. A general starting point is that hands are placed outside the shoulders with a loose grip on the barbell and elbows high. Ideally, work to have the athlete reach their elbows high enough so the upper arm is at least parallel to the floor. If these basics are met, encourage the athlete to push their shoulders forward slightly without rounding their upper back.
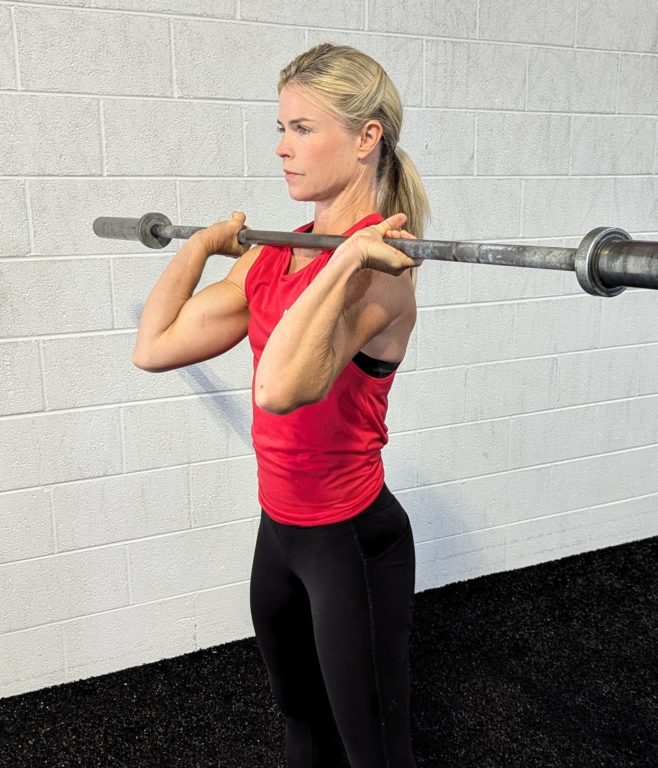
Tight grip
In theory, establishing this position is simple, but achieving it can be challenging for various reasons. One reason is that many athletes want to keep a tight grip on the bar. This is understandable as it makes the athlete feel more secure. However, this will often limit the height of their elbows and place unnecessary stress on their wrists.
In this instance, you can cue or manually adjust the athlete to a loose grip and potentially even release their fingers from the barbell, although releasing fingers from the bar is not ideal because this will carry over to a thruster or the transition phase from a clean to a jerk.
Frankenstein Squat
Frankenstein front squat
If the athlete is still having difficulty understanding the concept of the rack position, you can introduce them to a drill called the Frankenstein squat. In this drill, the bar rests on the athlete’s shoulders with their arms extended in front of their body, resembling the posture of Frankenstein’s monster. This drill will help the athlete understand that we want the bar to rest on their shoulders, not be supported by their hands. As the athlete squats, their hands need to stay high and their chest stays up to keep the bar from rolling down their arm. This drill is particularly useful for athletes who struggle to get the correct rack position, as it provides a clear visual and physical representation of the desired position.
Flexibility
Lack of flexibility in the upper body can also lead to a poor rack position, which can take a fair amount of time to improve. Athletes may assume they lack wrist flexibility because that is where the discomfort will arise. However, if they have the flexibility to do a push-up, they have adequate wrist flexibility for the front squat. The more likely cause is a lack of flexibility in the lats, shoulder/pec region, and/or triceps. Although not fancy, the best way to improve this position is to spend more time in that position and work toward the best position possible. For example, have them put some weight on a bar in the rack and practice driving their elbows up. Depending on the athlete’s current flexibility, this can be completed with or without unracking the bar. Use this stretch as part of a warm-up. Other stretches and foam rolling in that area can also be performed but should be secondary to working the specific front-rack position.
You may also have athletes who start with a sound rack position but drop their elbows as they descend into the squat. This is often addressed when athletes are in the bottom position of the squat, but the likely cause is that the elbows start dropping immediately as the hips push back and down. These athletes should be instructed to immediately drive the elbows upward as they descend and continue to do so throughout the squat.
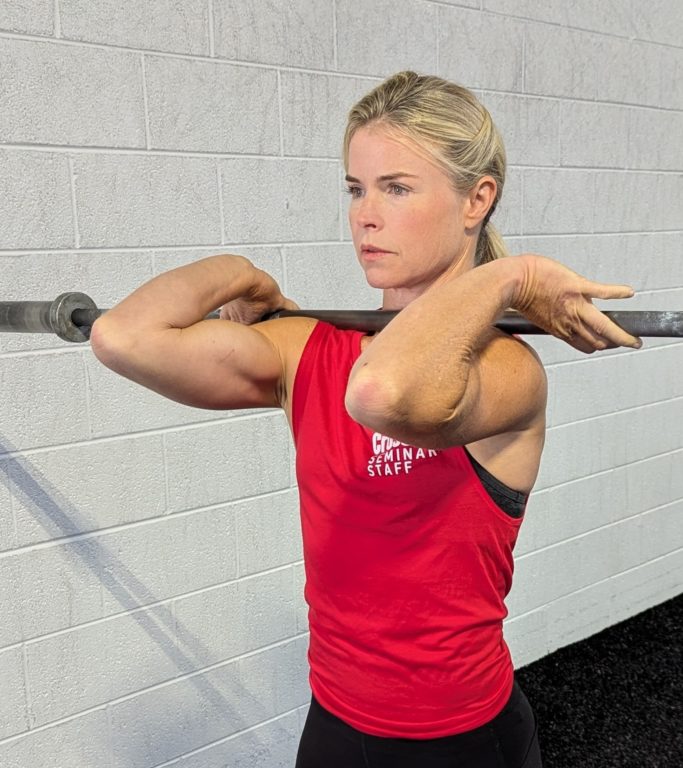
crossed-arm rack position

Crossed-arm rack position
Those with lifting experience may ask about using the “crossed arm” rack position, as is common in traditional gyms.
We don’t use this position because it’s not used for other movements. You cannot learn to clean, jerk, thruster, etc., from this crossed-arm position. This position, however, might be a functional temporary substitution for someone with a wrist injury, and it may be used if someone cannot safely front squat due to mobility issues they are actively addressing. Implements like dumbbells or kettlebells can also allow for a better rack position if safety is an issue. The primary safety issue with that position is the elbows will likely collide with the knees. However, do not allow this crossed-arm position to become a crutch. The mobility required for the front-rack position is helpful for other movements and can be acquired with practice.
Hips Rising Quicker Than the Shoulders
You will likely encounter athletes who raise their hips faster than they raise their shoulders when standing up out of the bottom of the squat. This can push the barbell and athletes forward and cause extra stress on their back to finish the lift. If you see this, cue the athlete to drive their hips forward under the bar. In subsequent reps, cue the athlete to drive their elbows up out of the bottom of the squat or to drive their shoulders up and into the bar on the lift.
When the correct execution of the elements above is achieved, the bar will likely be traveling in a straight line, which will allow for the heaviest loads to be lifted and reps to accumulate quickly while making the movement safer. The key aim for the coach is to correct the root cause of the issue. For example, if the athlete has an immature squat and their elbows drop, an effective cue will likely NOT be “drive the elbows up.” The correct cue or corrective strategy will likely include those that work to raise the torso. As with all movements, progress here can take time, and athletes may grow frustrated as the changes accumulate incrementally over time. Be sure to check in and let them know that progress has been made!
Once an athlete has improved their front squat, they’ll likely notice that their cleans and thrusters will improve too.
more front squat resources
- Watch The Front Squat with Denise Thomas
- Watch The Front Squat Demo
- Try the single-arm kettlebell front squat
- Try the double-arm kettlebell front squat
- Take the Level 1 Lectures Course for a refresher on the 9 foundational movements
Comments on Developing the Front Squat
Fantastic post!
Excellent article detailing the essentials of front squatting. Every trainer should bookmark this page and review before any front squat class. I will be using the Frankenstein drill next time I warm-up my athletes for the front squat.
Mastering the basics! thanks for the information one more time.
Developing The Front Squat
3